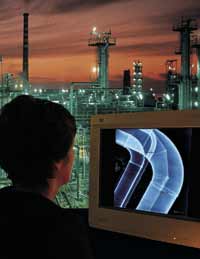
Digital X-Ray Work Station
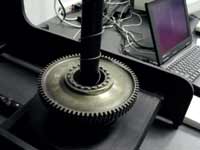
Gear Inspection Using Eddy
Current Testing
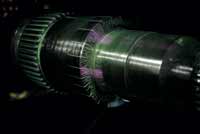
Liquid Penetrant Testing of
a Part
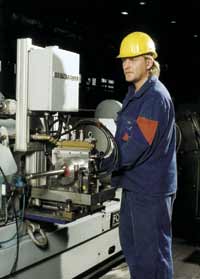
Ultrasonic Bar Inspection
System

X-Ray Inspection of a Pipeline
|
In 2001, technicians at the
Boeing Co. were asked to examine the Liberty Bell after
a man wielding a hammer attacked it. Reportedly, there was
little damage done to the historical icon, but the National
Parks Service was concerned enough to call for a structural
evaluation. Boeing technicians had the task of testing the
integrity of the Liberty Bell's structure without doing
any further damage to it, a case that clearly called for
nondestructive testing.
Boeing's evaluation of the Liberty Bell is just one of
the many applications for nondestructive testing, but it's
a prime example of why NDT is necessary. Whether it's a
250-year-old historical object or a 2-year-old jet airliner,
there are some things you just can't afford to damage while
testing for defects.
"Nondestructive testing is any means of examining
an object without impairing its life or its future usefulness,"
explains Betsy Blazar, senior manager of marketing and membership
at the American Society for Nondestructive Testing.
There are several nondestructive testing applications
used in a variety of industries today. What follows is an
overview of several methods, information on some new technologies,
and the basics of NDT certification--all provided to help
you determine whether NDT is something your company might
want to consider.
If you think NDT isn't useful for your industry, think
again. Because the term NDT encompasses so many different
testing methods, it can be found in a host of different
industries. Here is just a sampling of industries that employ
NDT methods:
 Aircraft and aerospace
 Power generation and utilities
 Chemical and petrochemical
 Bridge and building inspection and fabrication
 Electronics and microelectronics
 General manufacturing
 Military
 Historical renovation
Typical NDT methods
To more clearly understand how these industries employ
nondestructive testing, it's important to examine the most
common NDT methods. These include visual and optical inspection,
penetrant testing, magnetic particle testing, electromagnetic
testing, radiography, ultrasonic testing, acoustic emission
testing and leak testing.
 Visual and optical testing. This involves looking
at an object to detect flaws on its surface. This is a familiar
concept for most quality control labs, whether they use
microscopes, borescopes, magnifying glasses or other visual
inspection devices. However, it's not as simple as it sounds.
"Visual testing can be one of the higher-end inspection
methods," says Bill Wiley, NDT instructor at Southeast
Community College in Milford, Nebraska. "For example,
robotic camera systems have been designed to go into environments
where a person can't go, either due to the aggressive nature
of the environment or nonaccessibility due to size constraints."
 Liquid penetrant testing. With penetrant testing,
test objects are coated with a visible or fluorescent dye.
A developer is applied, which acts as a blotter, drawing
trapped liquid from flaws open to the surface of the part.
With visible dyes, color contrast between the dye and the
developer allows the tester to see any cracks or other flaws
on the surface.
Liquid penetrant testing is fairly inexpensive and, according
to Wiley, an easy-to-teach and -learn method. It's ideal
for anyone interested in detecting cracks on the surface
only. You won't be able to perform a volumetric inspection
using this method.
 Magnetic particle testing. Most ferromagnetic materials
are candidates for this method. The part is subjected to
a magnetic field and then either dusted with dry iron particles
or covered with a solution containing magnetic particles.
Distortion of the magnetic field occurs on surface and near-surface
flaws, concentrating the magnetic particles near those imperfections.
The pattern of the iron particles produces a visual indication
of the flaw.
This type of NDT has some subsurface detection capabilities,
possibly up to a quarter of an inch, says Wiley. However,
magnetic particle testing is limited in one area in particular:
It only works with ferromagnetic materials.
 Electromagnetic or eddy current testing. With electromagnetic
testing, electrical currents are generated by an induced
alternating magnetic field. In conducive materials, the
flow of eddy currents is interrupted at imperfections, including
dimensional changes or changes in the materials' conducive
and permeability properties.
"The industries that most regularly utilize eddy
current testing are aircraft and aerospace, power generation
and utilities, and chemical and petrochemical," explains
Wiley. "The aircraft industry uses it for crack detection
and material corrosion assessment. Power generation and
chemical plants use it to inspect corrosion, cracking and
other damage in the tubing of heat exchangers and steam
generators."
Electromagnetic testing is typically a more expensive
method than the aforementioned methods--and more difficult
to learn and implement.
 Radiography. Anyone who's ever broken a bone is
familiar with radiographic testing. It involves the use
of gamma or X-rays to examine imperfections through a part.
A shadowgraph results in a visual map of density changes,
cracks and other flaws. Conventional X-ray systems are capable
of being brought to a part for cases in which it's not feasible
to bring the part to the system.
Innovations in the technology of radiographic testing
have brought about digital radiography, real-time radiography
and computerized axial thermography, or CAT scans.
"With digital radiography, the film cassette that
captures the X-ray image is equipped with microelectronics,"
Wiley says. From there, the information stored within the
cassette can be inserted into a computer for image enhancement,
where the technician can manipulate the image to better
see the discontinuities within the part.
With real-time radiography, a special electronic sensing
device detects radiation as the path goes through a specimen.
Then a charged coupled device is connected to the electronics
package, where it's converted to an image you can see on
a monitor. "The nice thing about real-time radiography
is that if you have motion control, you can actually rotate
the part while it's underneath the X-ray beam to give you
different views," explains Wiley.
 Ultrasonic testing. With ultrasonic testing, high-frequency
sound waves are directed toward a material to detect changes
in the material's properties. A common form of ultrasonic
testing is pulse echo, in which sound is transmitted into
a test object and reflections, or echoes, from imperfections
in the part are returned to a receiver.
Another method is contact testing, which works in the
same capacity as an ultrasound test performed on pregnant
women. In the case of contact testing, the technician has
a transducer in-hand moving across the part to detect flaws.
"Within the contact testing realm, there's precision
thickness measurement, down to thousandths of an inch or
less," notes Wiley. "If you want to get even more
advanced, you can do ultrasonic data acquisition and imaging."
 Acoustic emission testing. Unlike ultrasonic testing,
this method involves detecting the sound a flaw itself makes,
rather than directing sound at the flaw.
For example, when a tank is pressurized, defects within
the tank will basically put out signals of their own. This
is known as an acoustic event. "Crack growth is an
example," says Wiley. "If you have three or more
sensors located in one area, you can triangulate where that
defect is located."
 Leak testing. An everyday example of leak testing would
be immersing a bike tire in water to see where the bubbles
come out. Leak testing techniques can be something as simple
as a bubble test--in which a soapy film is applied to a
part to detect bubbles--to much more advanced techniques,
like performing a halogen diode test, which detects the
presence of halogen gas that's been passed through a part.
These methods for nondestructive testing haven't changed,
notes Blazar, but the techniques used within these methods
are constantly being improved. Alan G. Julier of Agfa NDT
Inc./ Krautkramer Ultrasonic Systems notes a trend in ultrasonic
NDT toward phased arrays.
"Typically, if a technician wants to examine a part
ultrasonically, then the choice of the sensor depends on
the size of the defect and thickness of the material,"
he explains. "Then, having chosen that transducer,
we have to mechanically move it over the surface of the
object. Change the part's thickness, and you have to change
the sensor." Phased arrays, however, allow the technician
to make all those changes electronically on one sensor and,
in many cases, eliminate the need for sensor movement over
the surface. Julier explains that the medical profession
has been using this technique for years, but it has just
recently caught on as an industrial testing method.
Julier also notes some "fringe" NDT technologies,
which can be considered NDT but don't fall into the handful
of typical methods. These include thermography, shearography,
holography, vibration analysis, strain gaging, ground-penetrating
radar and a host of visual and optical methods.
If any of the various NDT methods or fringe technologies
sounds like a good candidate for use at your company, consider
how it will incorporate into your established testing methods.
Nondestructive testing is not something you switch to in
replacement of your old testing methods. Rather, it's a
type of testing that can be incorporated into the quality
control lab. Most of the time, companies only implement
NDT when doing so is cost-effective. For example, one manufacturer
may make thousands of the same part, so performing destructive
testing on one part isn't going to dent the company's budget.
On the other hand, a company that makes very expensive equipment--roller
coasters for example--simply can't afford not to use NDT.
In cases in which your company is awarded a contract that
specifically mandates nondestructive tests, consider outsourcing
NDT or employing NDT technicians who are certified to the
standards of ASNT.
In order to perform even the most basic nondestructive
test, a technician must be trained, and, in many cases,
certified to standards like that of ASNT.
"It's extremely important to be certified,"
says Blazar of ASNT. "It's the only way that any entity
can be assured that their technicians have experience in
specific methods and techniques." ASNT's core certification
program is the NDT Level III examination, which it has offered
since 1976. In the last couple of years, ASNT has offered
a Central Certification program, which both tests for competency
and looks at the experience of the individual. A list of
all individuals certified to ASNT and more information about
certification is available at the ASNT Web site, www.asnt.org.
"Central certification can provide a company market
advantage," explains Blazar. "Having third-party
certified personnel demonstrates commitment to quality and
professionalism in NDT. For the individual, it is a professional
credential that he or she carries to any employment."
Companies can certify their own NDT technicians, and many
do with tests based on the ASNT criteria. In the long run,
however, it may be beneficial to get ASNT-certified because
it's commonly accepted as the standard third-party certification
organization.
Educational institutions that offer courses in nondestructive
testing usually train students to become fully prepared
for ASNT certification.
Although about 4,000 people hold ASNT Level III certification
and ASNT membership is about 9,000, interest in nondestructive
testing is only inching along. In fact, Julier predicts
single-digit growth potential for the NDT market, and that's
only if there's an upswing in the economy.
"From a sales point of view, the growth has only
been about 4 percent during the past five years," Julier
notes. "Sadly, NDT is often viewed by many companies
in the same manner that they view quality assurance: a necessary
evil that has the potential to decrease 'out of the door'
shipments. It's generally implemented because the product
has to meet critical safety requirements."
Blazar notes, however, that this focus on safety has boosted
quality control labs' awareness of NDT. "The world
is becoming more cognizant about safety, and because of
these heightened concerns, NDT is getting more recognized,"
she explains.
"Look at the age of some of our infrastructure in
this country," she continues. "People are concerned
about the integrity of our bridges, our railroads, etc.
That's why NDT will keep growing."
Despite its age and previous circumstances, the Liberty
Bell has held up remarkably well, as technicians at Boeing
discovered. They performed a number of tests to determine
if the attack had caused any serious damage. Radiographs
of the bell were taken and compared to radiographic images
from more than 25 years prior; ultrasonic inspection was
used to locate any flaws within the bell; technicians used
eddy current testing to map the surface of the bell, determine
its conductivity and evaluate its consistency; and florescent
penetrant testing was used to check the bell for cracks
(not including the obvious one).
Much of the information in this article was provided by
the Collaboration for Nondestructive Testing Education's
NDT Resource Center, an online NDT information source for
students, educators and professionals. For detailed information
about NDT, visit the Web site at www.nde-ed.org.
Further information about NDT can be found at the American
Society for Nondestructive Testing's Web site, www.asnt.org.
Kennedy Smith is Quality Digest's assistant editor. Letters
to the editor regarding this article may be sent to letters@qualitydigest.com.
|