What started out in 1928 as a blacksmith and carriage smithy is now, 94 years later, a modern, customer-focused vehicle manufacturing company in the heart of Switzerland. These days, Sutter AG Lungern Fahrzeugbau specializes in the development and manufacture of three-side tippers of up to 40 tons, loading bridges for all trucks and vans, box bodies, tipping bodies, quick-change systems, special vehicles, as well as maintenance and repairs of bodies and trailers.
ADVERTISEMENT |
Before purchasing the Creaform 3D scanner, engineers at Sutter spent about 5% of their working time manually measuring certain components with complex geometries to fit them to vehicles. These are mainly aluminum covers, underride guards, crane-mounting elements, and other vehicle-mounted components tailored to the vehicle’s requirements or the customer’s wishes.
Before, these parts were manufactured without the possibility of double-checking them before the final assembly; it was impossible to check the geometries on the vehicle itself. Apart from the extended time it took to develop the components, the effort and expense required to have them modified and adapted by qualified metal workers for their final use was enormous.
Requirements for a new measuring system and implementation
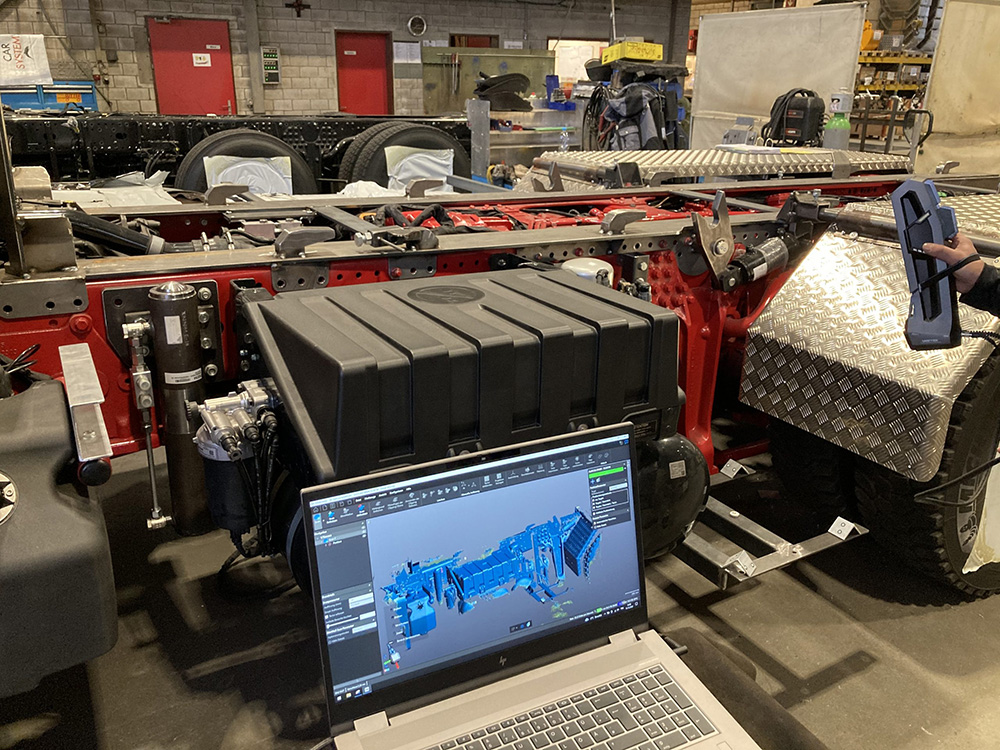
Sutter often has to deal with large scanning areas, such as truck chassis zones, where the distance between the individual components is important and the measurement accuracy must remain high. The crucial requirement in purchasing the measurement system was, therefore, accuracy.
One of the key factors in choosing Creaform Go!SCAN SPARK was the ability to purchase not just a product but a complete service. This included: the purchase of consumables for the scanner and a laptop; support for the work onsite; and after-sales service in case of maintenance, repairs, and questions.
Implementing Creaform’s 3D measurement solutions was intuitive, because it didn’t require a new process to be defined—just an existing one to be replaced. In practice, the manual measurement process was simply replaced by 3D scanning. This not only provided the design department with more measurement data but also allowed it to check the actual dimensions and geometries of vehicle components during development (a double-check).
Because Sutter is a small company, the entire process, from 3D scanning to ordering raw materials for manufacturing components such as sheet metal, is handled by one of the engineers in the engineering department. A single two-day training session by a Creaform technician made it possible for Sutter to be fully operational and independent immediately.
Teamwork between Go!SCAN SPARK, engineering department, and workshop
Sutter handles a multitude of diverse projects. For example, here’s how the design, manufacture, and assembly of a customized toolbox on a truck chassis for transporting construction machinery was created in cooperation with the workshop and the engineering department.
Due to delivery bottlenecks at the vehicle manufacturer, the “construction machine taxi” project was created under tight time constraints. This meant the engineering department had to do a lot of advanced preparation using CAD designs. When the vehicle arrived, an advanced design status was achieved quickly, and the workshop itself built some additional attachment holders for toolboxes.
Another application Sutter has found for the technology is to ensure traceability in the archive, per the ISO 9001 standard. Therefore, the additional mounting bracket was scanned with Go!SCAN SPARK.
Although the additional mounting bracket has a wide variety of surface finishes, colors, and geometries, it took very little time to scan, and the amount of material required (targets and matting spray) was low.
With the help of the VXmodel export function, everything could be imported directly into SolidWorks and traced quickly. This was mostly done using the measurement function, creating geometry (such as profiles, planes, and cylinders) in VXmodel, and then transferring the geometries directly into SolidWorks.
Where possible, purchased parts were replaced with 3D data from parts suppliers. However, this doesn’t happen as a rule, since missing 3D models are often replaced by mesh bodies from 3D scans. This method of working also increases the quality and completeness of the company’s database of purchased parts.
How Go!SCAN SPARK with VXmodel improved processes and practices
Apart from the main requirement of accuracy, there have been several improvements at a practical level:
• The space analysis in the planning of bodies, additional units, and attachments has been greatly simplified.
• The accuracy of measurements and production of raw parts has increased.
• Quality management has improved, tracking completed, and similar projects are now possible.
• The waste rate of raw parts has been reduced or brought to zero.
• The assembly and adaptation time by the workshop has been reduced, which avoids the need for highly trained employees (the objective is a plug-and-play strategy).
In terms of software, the VXmodel software module used by Sutter allows data to be scanned, processed, and aligned with the correct coordinate system quickly and easily, and exported to the SolidWorks CAD drawing program. The biggest advantage is exporting the raw data directly into SolidWorks. There, the data can be used for CAD comparisons or as an aid for designing other parts.
All these factors have led to considerable improvements in internal processes and shared practices in creating projects.
Future areas of application
Sutter’s goal is to gradually increase the use of the Creaform 3D scanner to spread the technical and practical benefits across all industries and product types.
Burim Shala, technical manager at Sutter, says, “Another step we would like to take as a company is to scan purchased standard components for which there are no 3D models so that we can plan and design our products with even more detail and precision. We would like to use the 3D scanner mainly for preliminary clarifications so we can design it earlier in the manufacturing process. In a nutshell, I would say that Creaform measurement solutions help us keep the focus on the ‘golden triangle.’”
Published Dec. 4, 2024, by Creaform.
Add new comment